
Good Compost
Composting garden waste is an important part of the gardening cycle and the more of the waste you can reuse in your own the garden the better, it will reduce trips to the local tip and the over following council collected brown bin and produce good organic matter to feed your garden so it is a win-win all round.

Digging compost into the ground
Some basic compost rules: Your compost bin, must be siting on the ground, whether bare soil or lawn, but never concrete or paving. As well as micro-organisms that are going to break down the plant waste so are warms and they need to be able to get to into your bin. You need at least 2 compost bins, 1 that is in use and the second one which was filled the year before and is now being allowed to rot.

Vermin proof compost bin
If you are going to compost food waste ( never cooked, or meat or fish) vegetable peelings etc., then this needs to be in a sealed vermin proof compost bin.
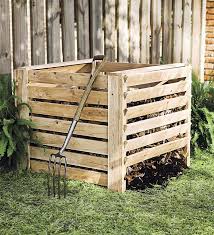
Wooden slatted compost bin
There are many compost bins on the market, or you can make your own. The basic rule is the bigger you can build your compost bins the better, as the larger the volume of decaying matter the better and faster it rots. Good air flow is also an essential for quick rotting.
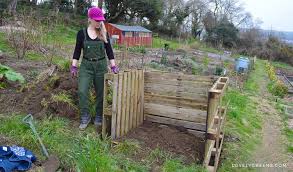
Building wooden compost bin
If you are building your own then a minimum workable size is a 1m x 1m by about 1m in height. Old pallets are good for the sides as they let the air in, or old scaffold boards cut to length with regular gaps left between the boards. The front wants to be open so barrows can be wheeled in and emptied, but as the garden waste gets higher there needs to be the ability to slot boards in across the front and slowly build the front up as the compost heap grows in time.
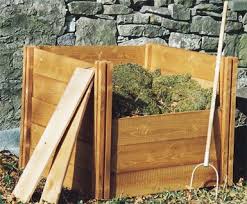
Adding boards to front of wooden compost bin
Now you are ready to get composting.
Composting: Use one bin at a time, all annual weeds can be composted,
DO NOT COMPOST perennial weeds, i.e. nettles, docks, bindweed, ground elder and mares tail (these will have to be taken to the tip or burned).
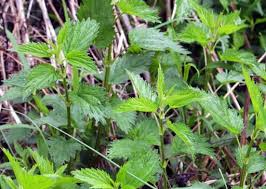
Stinging Nettles
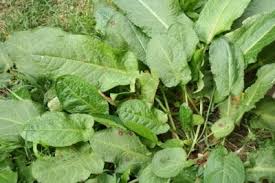
Docks
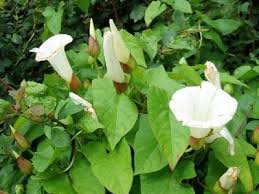
Bindweed
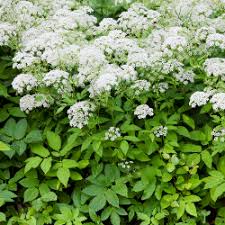
Ground Elder
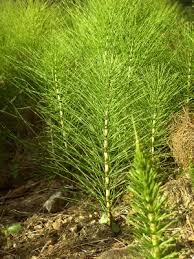
Mares tail
Grass cuttings and some fallen leaves, these make good ingredients for the compost; layer these including layers of shredded paper and the odd torn up cardboard box. Also ‘hard’ garden waste, this is everything that is not green, i.e. branches and stems, these will be very hard to compost if they are not chipped first, add chipped layers into the compost, or remove woody material from the garden. It is also important that the compost bin dose not dry out, so if the contents are looking very dry, put a couple of cans of water on it.
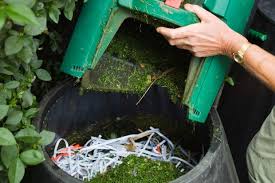
Adding shredded paper and grass clippings
To help speed up the composting, old carpet or blanket can be put over the top of the compost heap.
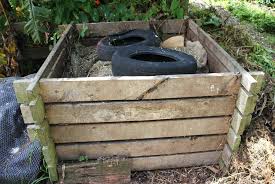
Covering the compost with an old carpet or similar.
There are two schools of thoughts either turn the compost regular every 4 to 6 weeks, this requires 2 bins, so the heap is regularly turn from one to the other, or leave in the layers, perhaps experiment to see what works best.
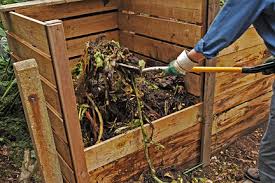
Turning compost
Once the bin is full it will take approximately 1 to 2 years to break down, it maybe quicker depending on how large the heap, the larger it is the hotter and the quicker it rots, also how dry it is and of course what garden waste is in it.

Digging out rotted compost from the compost bin ready for use
Leaf mould, this is a wonderful soil improver and almost any gardener can make this, no matter how large of very small your garden is. It can be dug in or act as a top dressing.

Rotted leaf mould
If you have enough space then you can build a leaf mould bin again 2 are needed. Each bin should be a minimum of 1 x 1m and 1m in height. A post on each corner and 4 strong straining wires set at equal distances up the posts, then attach the chicken mesh to the wires, again the bin will compost quicker if it is on soil. If you only have a small garden then black bin liners can be used and stored in a shady spot out of the way, like behind the shed.
Rake up and put some leaves in with the compost the rest to go in the wire bins, use one at a time, to speed up posses can cover the bin, or fill up a bin liners half full, twist the top and tie with string, next punch 5 to 7 holes in the bottom of the bag with a garden fork, store in a shady spot. It will take about 1 to 2 years for the leaves to rot and become leaf mould.
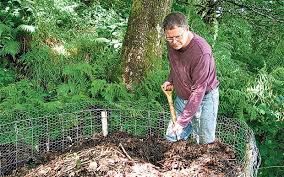
Digging out rotted leaf mould for use.
Food waste, even if you have a tiny court yard garden then you can produce good compost from food waste.
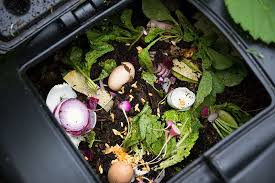
Putting food waste into a vermin prof compost bin
A rat proof compost bin (provide by the local council, or brought from a good garden centre) place on bare earth. For all vegetable, bread, eggshells and food waste. This must be placed onto the bare soil. Layer the food waste with shredded paper and unprinted cardboard torn up. Do not allow the compost to dry out. It will take 1 to 2 years to rot.

Digging out rotted compost from the compost bin ready for use
Now you should have all the knowledge you need to be a compost master.
Good Luck!
Dazzling Dahlia
September is the month these bright and blousy garden drama queens come to the for, from the delicate with dramatic foliage to the massive dinner plate show stoppers. Making striking additions from garden boarders to centre pieces in a flower arrangement, Love them or loath them, there is much to admire in these old fashioned garden favourites.
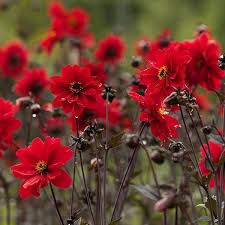
D. Bishop of Llandaff
D. Bishop of Llandaff: This old favourite, has striking dark purple foliage standing 90cm tall, with dramatic bright red single flowers with golden stamens. A striking addition to the late flower boarder.
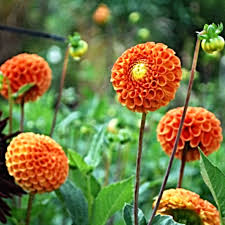
D. Bantling
D. Bantling: A fine pompom Dahlia with rich mid green foliage and a mass of round vibrant orange flowers up to 90cm tall. Good for flower arranging.
D. Lindsay Michelle: This is a show stopper of a Dahlia with large flowers held above green foliage. The base of the petals are a clear yellow and the serrated tips a shocking pink. A dramatic planting and superb as a cut flower.
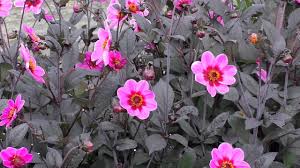
D. HS Wink
D. HS Wink: dark burgundy foliage, with clear pink single flowers with a magenta base splash and yellow stamens, make this Dahlia a good choice for mixed late boarder planting. Up to 80cm tall.
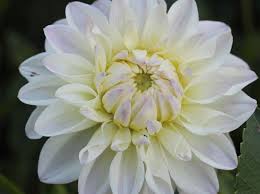
D.Witten
D. Witten: An elegant Dahlia with emerald green foliage and rounded white petals some flushed blush pink. At 55cm tall a good plant for the front of the boarder.
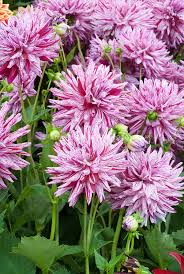
D. Blackberry Ripple
D. Blackberry Ripple: A tall hansom Dahlia at 110m with green foliage and large striking flowers of white and purple stripes. A must as a cut flower and a garden talking point.
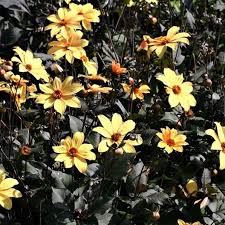
D. Bishop of York
D. Bishop of York: Purple foliage and clear yellow flowers with golden stamens standing at 90cm tall make this a must have addition to the central boarder planting.
All Dahlias like a good sunny spot in the garden and grow best in humus rich soil which dose not become waterlogged. They are not hardy, so here in the south of England they can over winter outside if protected from frost with either dry straw or horticultural fleece to protect the crown ( cut down to 20cm off the ground before the first frost and then protect).As long as the tubers do not get water logged , in heavy soils it would be best to lift the crowns. If you are concerned then you can treat dahlias in the classic way which is to lift the tubers, dust off the soil and allow to dry out in a shed.

Dazzling Dahlias
For many years Dahlias went out of fashion and were rather sneered at for being to over the top and only for flower shows, but they are making a come back and it is well deserved!
The Joy of Irises
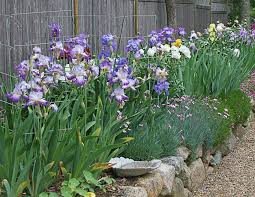
A mass of Irises
Mid to late May sees the arrival of he elegant and delicate flowers of the bread irises, whether the tall Flag at 75cm to 1.20m or the dwarf bearded for rockery at 20cm, the colour combinations and varieties are endless and I defy anyone not to fall head over heels in love with them. As a devoted self confessed Iris fan here are some of my favourites.
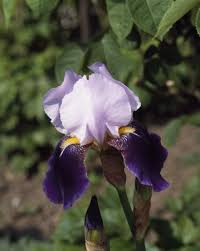
I. ‘Braithwaite’
Iris ‘Braithwaite’ this is a classic tall breaded Iris, with hansom wide glaucous grey leaves standing at 60cm high and flower stems up to 90cm. It has striking soft lavender standards ( the upright petals) and deep velvety falls with a splash of orange stamens. Flowers mid to late May.
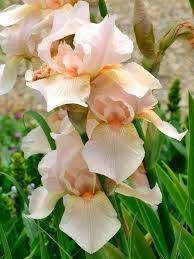
I. ‘Edward of Windsor’
Iris Edward of Windsor:fans of grey leaves up to 5ocm tall and flower stems to 90cm. A rich caramel pink with orange throat, a good addition to any mixed planting. Flowering late may early June
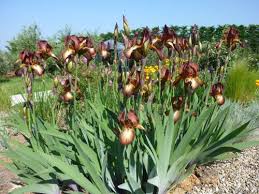
I’Kent Pride’
Iris Kent Pride: this is a stunning tall bread Iris with silvery swords of foliage up to 70cm tall, late may the most striking flowers appear, a deep chestnut with splashes of white and some white veining and a bright yellow blaze, a stunner in a collective Iris bed. Mid to late may.
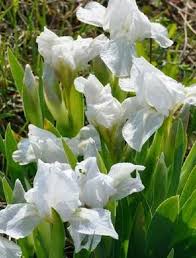
I. ‘Lilli-White’
Iris ‘lilli- white’: this is a striking dwarf bearded Iris with leaves up to about 20cm and 30cm flower stems with delicate white papery flowers. Flowering late April early may.
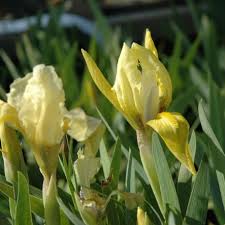
I. ‘Amber Queen’
Iris Amber Queen: Grey foliage up to 15/20cm and flower stems up to 20cm. Elegant primrose yellow flowers. Flowering April to May.
Iris ‘Cherry Garden’: grey foliage with flower stems just held above at 25cm, Flowering mid April to early may. Light violet coloured flowers.
All beard Iris, need well drainage soil and will grow well in gritty mediums and even on the edge of gravel areas, They like a hot sunny position and the rhymes do best when lying near to surface ‘To bake’ They are easy to care for, needing little to nothing in the way of maintenance,their main predator is the deadly slug/snail, so a hot sunny spot in gravelly soil should help keep them at bay.
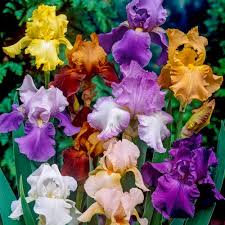
A riot of colours.
When the clumps become large with central areas of woody rhizomes and only leaves towards the outer edges and flowering is starting to decrease, this is the time to divide them. Division is done after flowering in late July to the early September. Use a fork and lift the clumps. Using a sharp knife cut away the woody old sections of rhizomes, cut into sections with healthy rhizomes and a good cluster of roots. Cut the leaf growth back by 2/3rds. Plant in new positions. in shallow pits with a free draining gritty compost. Or pots to grow on before transplanting.
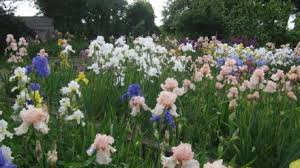
Iris in all their glory
Some say the bearded Iris is to fleeting and the slugs and snails too much of a problem, I would counter that some of the best things in life are here for but a short moment and therefore even more enjoyable for it. I hope I have inspired you to get started on your own Iris collection.
Caring for Clematis
Caring for Clematis
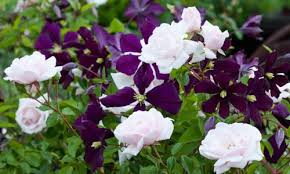
clematis the perfect planting partner
Clematis are wonderful climbers with one in flower in almost every season and a herbaceous group that scrabble across the ground. They are an easy plant to grow and very forgiving,But there seems to be a bit of a mystery about how to care for them, with pruning being high up the list.
Group 1
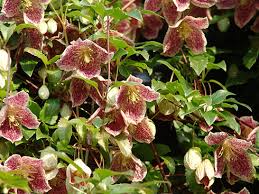
C. cirrhosa var.purpurascens ‘Freckles’
This group includes winter flowering clematis like C. cirrhosa, flowering in January and February. All the delicate alpine group with their soft green feather foliage and bell like nodding flower heads.
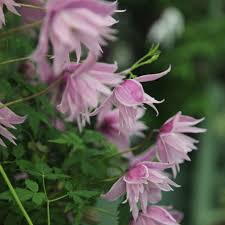
C. alpina ‘Markman’s Pink’
and the evergreen massive C. armandi, with it’s large dark green leaves with masses of single white, blushed pink scented flower end of April into March.
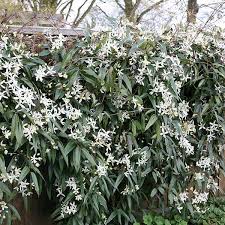
C. armandii
To the very vigorous and show stopping C.montana group, with it’s palmate leaves flushed purple and mass of single pink or white flowers in end of April/early May. This beast can cover up to 2 stories and make a play on telegraph poles. But it is quite a sight.
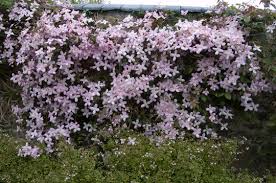
C. montana ‘Elizabeth’
Pruning Group 1: After flowering for all of them. For the more delicate winter flowering and the alpina, it is just about keeping it in check for the position and removing any dead sections, so they may not need pruning every year if you are going for the naturalistic look. For C.aramdi, again it is about keeping it in check so if the new growth is not making a bid on the neighbours garden prune it back to the main body of the plant leaving 3 to 4 buds of new growth. Remove any old and winter scorched growth. For the giant C.montana group again about keeping it with in limits, so prune as for C.aramdi. Also, the shears can be used just to cut of the dead flowers and keep it in check.
Rejuvenating an old and congested plant. For all of the types of clematis list above except C.aramdi. If the plant has become a woody mess, then cut to stems down to 30cm from the ground, saving any lower new shoots if possible, add a good balanced fertiliser, again carry this out after flowering. Water well. It may well take several years before the plant has returned to maximum growth and flowering.
Group 2
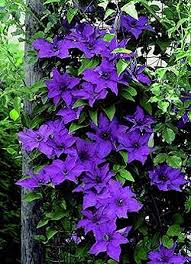
C. ‘The President’
These are the classic clematis with large showy flowers up to saucer size in a range of colours from the deep single colours of rich purples and pinks like C.’The President’ to the flashy stripes of the old favourite C. ‘Nelly Moser’.
to the striking C ‘Duchess of Edinburgh with it’s white double flowers.
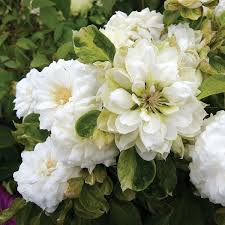
C. ‘Duchess of Edinburgh
These clematis flower May and June.
Pruning Group 2: late winter early spring, February is a good rule of thumb. The first thing to bare in mind is that these clematis flower on old wood. So firstly reduce the over all size the clematis so it fits back into the required space. The next thing is to work from the top of the clematis down, removing all weak wood. Always prune back to a strong set of buds. You want to be left with a good frame work of climber. If it is on a pillar or tripod, make sure it is a good 1m above the ground this gives the new shoots a fighting chance against the slugs and snails. Also if you prone off old flower heads and prune back a few of the long straggly stems after the main summer flowers you may get a sparser autumn flush of flowers.
Group3.
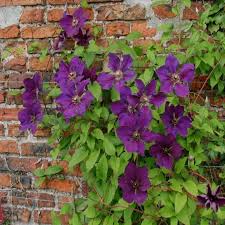
C.’Gipsy Queen’
This group of clematis flower late summer and well into the autumn The viticella group of clematis which C. ‘Gipsy Queen’ is one, are vigorous growers which produce an abundance of flowers 7/8cm across in a variety of deep reds and purples. Clematis tangutica and it’s varieties are like the alpinas in habit and growth, with the same fern like foliage and nodding heads of yellow flowers followed by attractive white seed heads which last through the winter.
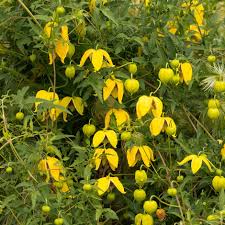
C. tangutica ‘Bill Mackenzie’
Pruning Group 3: These clematis flower on new growth. So prune in February/March . Most books suggested hard pruning to only 30cm off the ground to be honest to steel a march on the slugs and snails I would take them down to 50cm off the ground, prune to a strong set of buds.
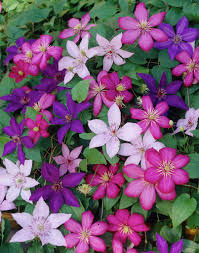
A Clematis to suit all tastes.
General Care: Most of us are quite crawl when planting clematis we plant them up against a wall where it is dry with poor soil. The old adage of planting the roots of the clematis in the shade and it’s flowers in the sun, has a lot in it. These plants do not like dry poor soils, they want a good soil which it moist all the time but not water logged. What a lot of people blame on clematis wilt- the disease is in fact a very dry and unhappy clematis. So pile on the leaf mulch, put on the tiles and slate to help shade the roots. As they are planted next to a fence, wall, house, it is dry as the roots are often in the rain shadow so water regularly.
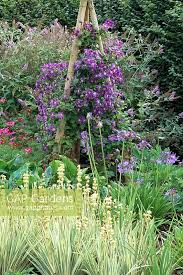
Less vigorous varieties can be grown up tripod in open borders
You should now have all the information you need to grow beautiful clematis. Enjoy!
Colourful Crocus
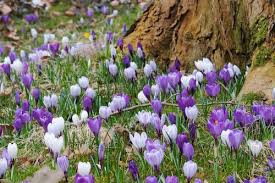
spring splendider
In early March sweeps of champagne fluted Crocus across lawned areas, in creams, whites, pale mauve and dark purple, butter yellow and lemon cream and with delicate veining can be enjoyed to the max, also in pots and containers near the house. With a bright sunny early spring day their delicate beauty is transformed, as these sun seekers open their petals wide to form shallow stars of wonderful contrasting basal beauty and bright orange stamens. This early spring show brings a splash of colour to the March srping garden. There are so many to close from but here is a selection of some old varieties that are proved to be good performers year on year.
Large Dutch Crocus, this group have larger showier flowers and are better in longer grass, some getting to the dizzying heights of 10 to 12cm Most flower in early to mid March.
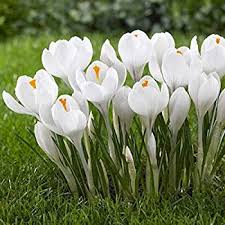
Crocus Joan of Arc
-
Joan of Arc. A brilliant pure white with a dark purple basal splash and brilliant orange stamens, this is a very hansom corm, making a good solid colour contract in a lawn planting.
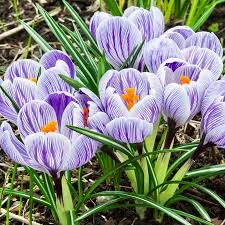
Crocus King of the Stripe
-
King of the Stripe : A dramatic crocus with white petals and dark purple veining, reaching down to a dark purple base. This crocus works well in a tall pot brought closer to eye level so the delicate beauty of the veining can really be enjoyed.
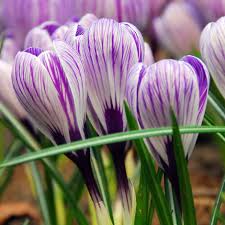
Crocus Pickwick
-
Pickwick: A show stopper of a crocus with light mauve petals with rich purple veining. Idea for a special spot in a flower bed close he the house or on a raised bank where the veining can be fully appreciated.
Chrysanthus varieties, These crocus are smaller then the Large Dutch varieties listed above growing to 7 to 10cm approx, For that reason they may be best for natural looking sweeps set in grass. They tend to flower earlier, Late January into February and some into March.
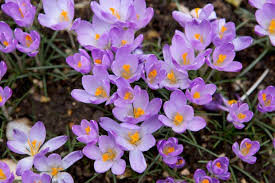
Crocus Advantage
C. Advantage: This is a very striking looking crocus with it’s three colours, the main petals are buttercup yellow, sliding down to the bottom of the petal to light mauve and to am imperil purple base. Quite a sight when the crocus opening fully in the winter sun.
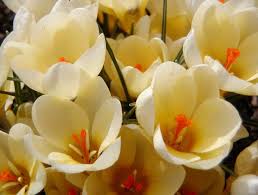
Crocus Cream Beauty
C. Cream Beauty: This classic crocus is a reliable performer, producing beautiful rich cream flowers with a contrasting bronze green basal splash of colour.
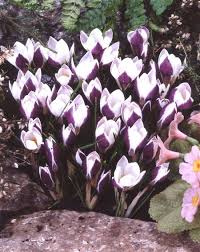
Crocus lady Killers
C. Lady killer: A dramatic purple violet crocus with a striking white rim, make this a good choice for a bold block planting.
Like all bulbs/corms they are very easy to grow, order/buy September. Plant end of September into October. Planted 7.5 to 10cm below the surface. For lawn and flower bed planting, plant 3 to 5 corms in a group in a single wide hole, carefully arranging the bulbs with the growing tip to the surface. Plant as single corms in pots and containers. They should be placed close to paths and doors, where they can be easily enjoyed with out a track down a cold early spring garden.
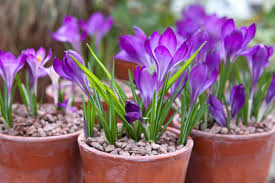
pots of colour.
There is one little and possible slightly bigger problem, these corms and more importantly their tender growing shoots are much beloved by mice and squirrels. In pots cover with netting or mesh, with a spacer making sure there is a good 10cm of space for the tips to grow and not get eaten. Out in flower beds and lawns it is pot luck and a case of over planting to compensate.
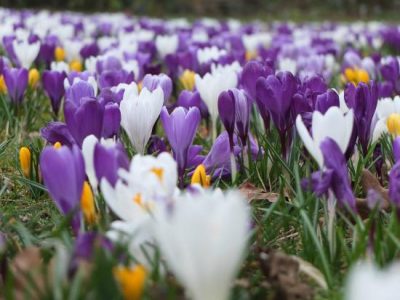
glorious crocus
But do not let that put you off as these are inexpensive jewels of delight and a MUST for any spring garden from the window box to the country arced Estate.
Enjoy!
Winter Berries

Winter berries
By February the winter can feel at it’s longest and possible it’s gloomiest with still short days and the leaden skies of possibly the coldest month. A splash of, knock you between the eyes colour is just what your garden needs to help lift your spirits. A lot of winter flowering shrubs are delicate and scented with much to commend them, but the vivid colour of the winter berries packs a strong punch. Here are some plants well worth adding to any winter planting.
Skimmer japonica ‘Foremanii’: This slow growing evergreen shrub is worth the wait, Its glossy emerald green foliage makes a dense low mound. It has sturdy groups of white waxy flowers held upright in the leaf axils and is not really scented compared to other Skimmers. However it is it’s striking groups of shiny red berries which it holds through out the winter that are the show stopper. It will tolerate dense shade and will grow on any humus rich soils. This female form needs a male to produce the berries, plant with S.japonica ‘Rubinetta’
Iris foetidissima: This iris is as tough as old boots and will seed about freely in any dry soil, it will cope well with thin chalk soils and semi-shade to dense shade. It makes thick clumps of mid-green leaves, which gently arch. It has small and frankly rather unimpressive white and creamy flowers. It is of course the berries that are the star turn, the ride fruit capsule opens in three segments to reveal row upon row of bright orange berries, these last well into late winter and will brighten any shady stop at a low level.
Pernettya mucronata ‘Bell’s seedling’: This low growing evergreen shrub makes dense sweeps of ground cover. With upright stems up to 50/70cm tall, with small dark green almost pricakly leaves. It has small insignificant white flowers early autumn followed by the most amazing berries. Which are round large pink berries that look like tempting gob-stopper sweets, which last nearly all winter. Bell’s seedling, is self-fertile but it will produce more berries if it is planted in a mixed group with male forms, P. mucronata ‘Mascula’. Grow in full sun to get the best berries although they will tolerate a little dappled shade. They need a good acidic humus rich soil with good levels of moisture but not water logging.
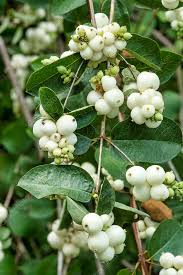
Symphoricarpos rivularis
Symphoricarpos rivularis: The ‘Snowberry’ loved and hated it seems in equal measure, but perhaps it is just not used to the best effect in most gardens. A deciduous shrub with arching stems up to 1.2/ 1.3m tall, it will tolerate dry shade but will berry much more freely if in a sunnier spot. The small round green leaves, fall and give way to clumps of white berries borne along the upper reaches of the stems. There is also a pink form. It looks at it’s most striking planted with an evergreen backing like a yew hedge, so the almost opayic white berries glisten against the dark back ground. It does tend to sucker so it needs to be kept in check. It will cope with both very dry soils to heavy soils and will tolerate shade although the berrying is much reduced.
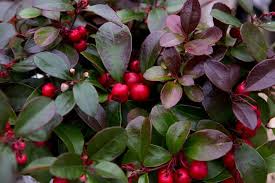
Gaultheria mucronata ‘Procumbens’
Gaultheria mucronata ‘procumbens’: Beloved by the winter bedding sellers and popping up in pots and tubs outside pubs and in mixed plantings of winter flowering pansies, this versatile shrub is much more then a one trick wonder to be stuffed into a pot as a temporary bit of bedding. It makes a good dense creeping ground cover with dark green leaves. It grows in dry and dense shade so can be invaluable as under planting at the foot of mature trees. It needs acid soil. Tiny white flowers are followed by large ‘cherry’ like fruits of shiny red berries which look good enough to eat. But don’t be tempted as all parts of this plant are poisonous.
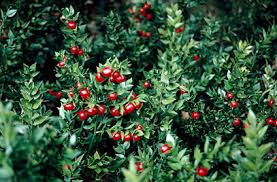
Ruscus aculeatus
Ruscus aculeatus: ‘Butcher broom’ A native low growing evergreen shrub with upright stems of small dark green leaves, With spiny tipped stems. Small bright red berries are held along the stems from September through the winter. It grows well on shallow chalk and will cope with dry shade.
To get the very best out of the winter colour these plants offer, they need to be carefully sited, either close to paths, near back doors, or the route to the garage, shed or log store or planted with an evergreen backing so the berry colour really stands out and can be easily seen.
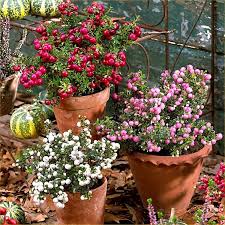
A group of pernettya in containers that can be sited near the ho
I hope you feel inspired to look again at planting bright berry colour that lasts beyond the autumn months. If you want help extending the planting colour in your garden to include the Autumn, Winter and early Spring, I know just the person to help you. Give me, Emily a ring Tel;01273 470753, or contact me through the contacts page of my web site, to discuss your garden project and your planting needs.
Bare Root and Root Balled Planting Season.
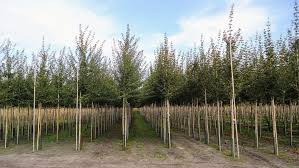
Field grown nursery stock ready for bare root supply.
January is slap bang in the middle of the busiest planting season, the bare root planting season, this is from mid- November to mid to end of March and down in the warmer climbs of the South East of England, 1st December to the end of February would be my cut off point.
Before the modern practise of being able to grow plant stock in containers so it could be planted all year round, this was the only time of year when planting could be carried out successfully.

planting a bare root tree.
There is a lot to be said for still using bare root and and root balled stock. In my mind trees and hedges, establish much better, as the plants are being planted in the dormant season, They have an opportunely to get their roots well and truly saturated, and root growth and establishment can begin late winter and early spring, meaning that by the time the planting gets to June it has had the best possible nurtured start. The plant will cope better with it’s first Summer growing season, no matter what is throw at it, particularly if a prolonged hot summer like 2018, is in store.
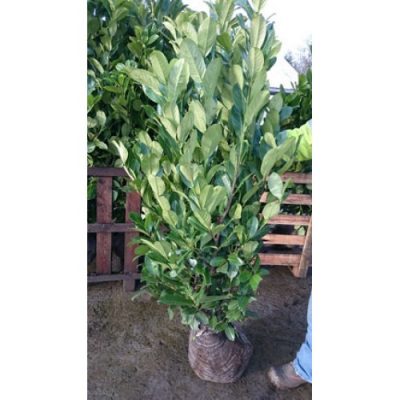
planting root balled evergreens
Also you get a lot more plant for you money so planting bare root and root balled is cheaper. Traditionally, deciduous plants were bare root and evergreens root balled although often larger deciduous trees these days are root balled.
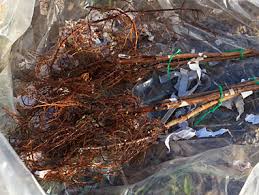
Bare root Raspberries
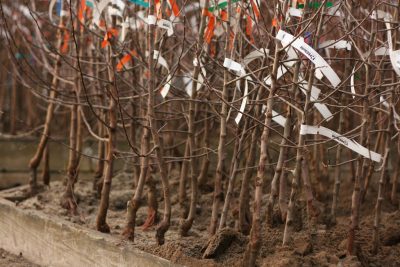
Bare root fruit trees.
So all trees, hedging, including evergreen can be planted as bare root or root balled. Also roses do very well planted bare root and traditional fruit nurseries supply must of their stock through the bare root season, with fruit trees and soft bush fruit supplied bare root, or for some of the larger trees and fan trained specimens possible root balled.

Planting a bare root rose
Also quite a few of the smaller more specialist nurseries still supply bare root herbaceous, which can establish well. They traditionally used to arrive packed in damp news paper, sadly plastic segmented packaging has taken over but perhaps with plastic now rearing it’s ugly head the nursery industry is starting to really put its house in order and news paper may make a come back, only time will tell.
My top tips for planting Bare root stock.
- when the stock arrives, if you can’t plant it straight away then heal it in so the roots are protected from the weather, ready for planting.
- Soke stock for a couple of hours before planting, or over night so the roots can rehydrate.
- Prepare the ground, if you are planting into uncultivated ground than dig a hole about twice the depth of the root ball forking over and breaking up the ground at the bottom of the hole, the hole should be twice the width of the root ball. Fill the hole back with broken up soil and good organic material well rotted F.Y.M or horse manure is very good, it wants bulk if possible. So the hole is now 1.5 times the depth of the root ball.
- Put the tree in the hole and use a garden cane across the top to check the depth of the hole, the tree should go back at the same planting level as it was planted before, the tenancy is often to plant too deep.
- Stake, if 1 stack it should be on the prevailing wind side whether upright or angled stacking. Or for larger trees or very exposed sites 2 stacked and a cross beam. Remember to always ties the tree to the stack, allow extra length in the tree ties so it can be let out as the tree grows. Most trees will only need staking for the first 3 years of their life. Depending on the variety of tree and jow exposed the site is.
- Back fill with the soil and manure mix, firming in well. Label you tree, planted by who and when and variety.
So there are still a few months of the bare root planting season left, enough time to get those planting orders in quickly over the New Year and get planting before the end of February. Be warned stock gets thinner on the ground as the season begins to draw to a close, so don’t delay. Happy Planting.
If you would like help with the re-design of a planting area or the design of a new fruit orchard, then I know just the woman who can help. Please do give me, Emily a ring Tel:01273 470753, or get in contact through the contacts section of the web site.
The Holly & The Ivy
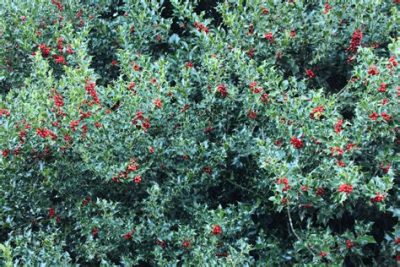
Holly adding mid-winter colour and structure to the garden.
As we head towards the throws of mid winter it is the iconic Holly and Ivy that bring a rich evergreen to the garden and with their variegated forms a much needed splash of colour on dreary winter days. With the added bonus of red berries, these two valuable plants can be a main stay of
the winter garden. Here are some variates that are well worth a spot in your garden.
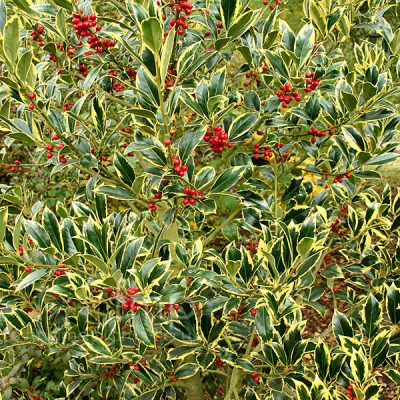
Ilex aquifolium ‘Aurea Marginata’
Ilex aquifolium ‘Aurea Marginata’: Medium to slow growing, large shrub to small tree, with a compact bushy habit, it has small glossy dark green leaves with a thin yellow margin and red berries ( female)
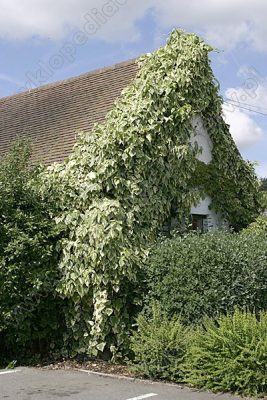
Ilex aquifolium ‘Aurea Marginata’
Hedra canariensis dentata ‘Varigata’: A vigorous large ivy that commands a large spot. Large hand sized leaves a dark mat green, with silvery and cream edges. It not only looks striking grown on a large wall, it also makes excellent ground cover forming mounds, and grows well in dry shade.
Ilex aquiflium ‘Pyramidalis’: A slow growing, hansom small tree with conical habit, it makes a good focal point in a small garden. Bright emerald green foliage with wavy, spiny edges and an abundance of red fruit (female)
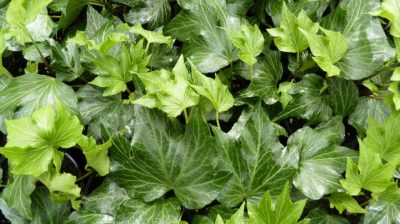
Hedra helix ‘Green Ripple’
Hedra helix ‘Green Ripple’: A delicate ivy, with small mid green foliage, with rippled edges and deep lobs. Good on small walls.
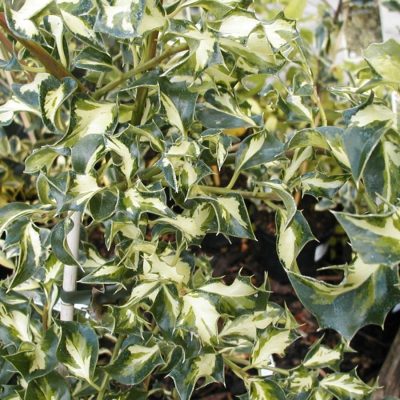
Ilex aquifolium ‘Silver Milkmaid’
Ilex aquifolium ‘Sliver Milkmaid’: A Large shrub with open habit, spreading when mature, Dark green glossy leaves with white central splashes. Red berries freely borne (female)
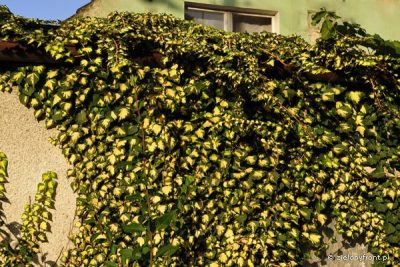
Hedra helix ‘Gold Heart’
Hedra helix ‘Gold Heart’: A striking ivy, non vigorous, pink stems hold small neat dark green leaves with a bright yellow splash of colour in the centre. Ideal for a low fence or small wall.
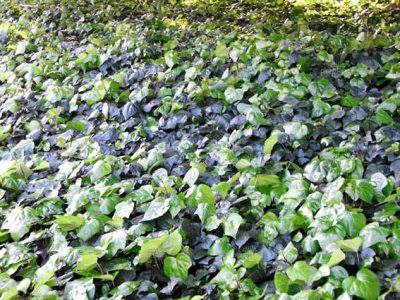
ivy grown as ground covers
Both Hollys and Ivies are low maintenance plants that thrive in semi-shade and in both cases will cope with some dry conditions, they will grow well in most soils but do not like water logging. Although holly has the dramatic berries the flowers/fruits of the ivy should not be missed, arriving mid autumn onwards and flowering in the winter months,it is a bonus to many insects. Of Course with Christmas not far off, holly will be brought into the home for festive decorations, Ivy can look equally good, either in it’s natural form or spayed silver or gold.
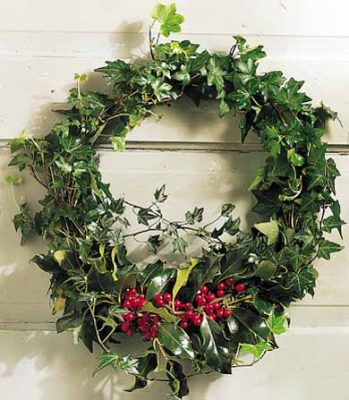
Holly& Ivy as Christmas decorations
These two plants are often under used in the garden, which is a great shame as they have so much to offer, both as a back drop for other ‘showier’ plants and very much in their own right. I sincerely hope that will change.
Shelter Belts and Tall Hedges.
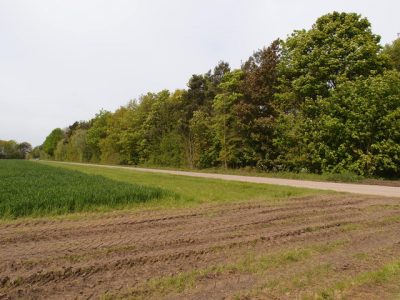
A mature shelter belt.
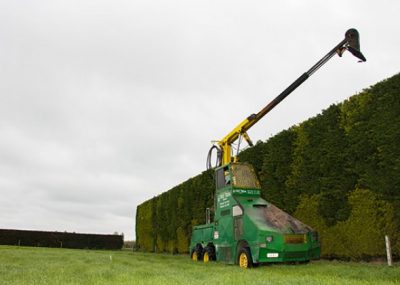
Now is the time of year when autumn winds and winter gales start to threaten that it is a good idea to see if the planting of a shelter belt or taller hedge can help to protect your garden. These natural living barriers help to reduce the wind and when species of different heights are chosen the wind can be slowed down and filtered, to create a milder and more sheltered aspect with in the centre of the garden. Here are some suggestions.
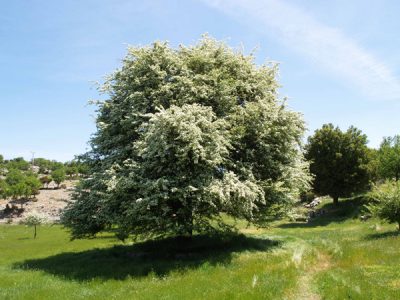
Crataegus monogyna
Crataegus monogyna: the native ‘Quickthorne’ seen through out the countryside, with small mid green leaves, clouds of white blushed pink flowers in May, butter yellow autumn colour and round blood red berries produced from September onwards, beloved by birds. It can grow to a tree of 5-6m or be grown as a dense hedge up to any height or be used as the scrub under story in a shelter belt planting. Very hardy will cope with strong winds including sea gales. Grows in almost any soil sun to part shade.
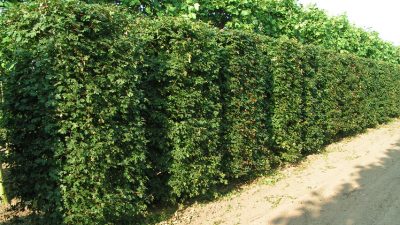
Acer compestre
Acer compestre: The native Acer to Britain. Makes a striking small to medium tree of 6-7m, with round habit. Also a very good hedging plant and it will be seen in mixed field hedging. Small palmate leaves of light green turning a golden yellow in autumn. Very hardy and will cope with strong winds. Grows on thin chalk soils to heavy water logged soils.
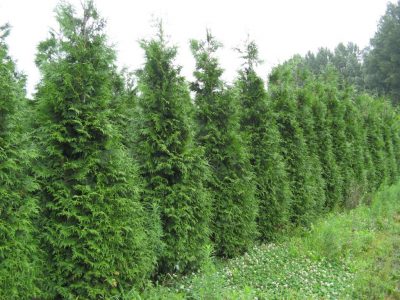
Thija plicata
Thija plicata: A superb conifer, making a dense tall evergreen hedge that will cope with salt winds, or used in a mixed shelter belt, with mid green foliage and a conical habit up to 6m tall. Will tolerate a wide range of soil conditions from damp to thin chalk soils.
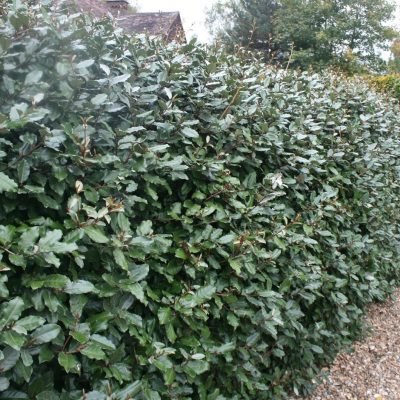
Elaeagnus x ebbingei
Elaeagnus x ebbingei: A wonderfully tough evergreen shrub, with a shaggy habit, which can be an invaluable part of the lower story of a mixed shelter belt or can be clipped to produce a tall wind break hedge. It will cope well with windy seaside conditions. Dark green leaves with a silvery white underside and small white flowers, there are many golden variegated forms. Grows in most soils but does not like waterlogging. 2.5-3m
Prunus spinosa
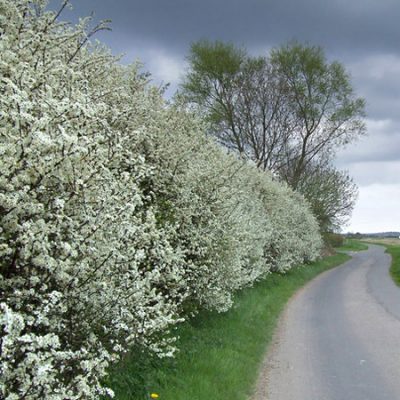
Prunus spinosa: the native Blackthorn/sloe. A dense spiky shrub for the under-story of a mixed planting shelter belt or as a small tree up to 3-4m. Seen in mixed field hedges though out the countryside. The first blossom of the season with small white almond scented flowers mid to February to early March, produced on naked stems. Small mid green leaves which go a light yellow in the autumn. Bitter small dark blue fruits produce late summer early autumn, good for making sloe gin. Tolerates strong winds. A valuable addition to a shelter belt.
Corylus avellana
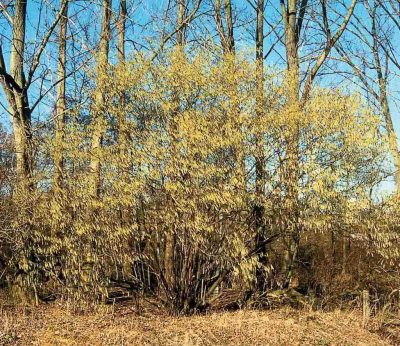
Corylus avellana: the native ‘hazel’ grown as a tall hedge, or coppiced under-story in a shelter belt or as a tree of 6m tall in a shelter belt. Catkins are formed in Autumn and then open in mid winter along the bare stems, round mid green leaves with golden autumn colour and nuts which feed wildlife. Tolerates strong winds, and almost all soil conditions, except very dry chalk.
cutting a tall Hedge.
For a mixed shelter belt, plant trees 2 to 4m apart in rows of staggered lines, plant groups of shrubs to form the under story, at 45-90cm apart. For wide shelter belts, plant the taller trees in staggered rows down the centre with under story shrubs in rows on the windy side and inward side of the belt, with lower under-story planting under the central rows of trees.
For tall hedges plant at least 2 staggered rows if not three, of the same species.
Now is the time of year to get planning your shelter belt or wind break hedge, with the best time to plant in the bare root season which is the end of November early December up till about the end of February or the first half of March. Use bare root or root balled stock, to get the best value for money. Also planting small stock helps aid establishment. Also use, grow tubes, rabbit guards and mulch mats. Don’t forget your new planting may well need watering through the summer months for the first few years to aid establishment and it will need grow tubes removing and rabbit spirals and mulch mats checking. Also it will need on going maintenance over the years.
If you want help planning a shelter belt and windbreak, and need it planting, I know just the woman who can help you. Give me, Emily a ring on 01273 470753.
Glorious Grasses
glorious grasses
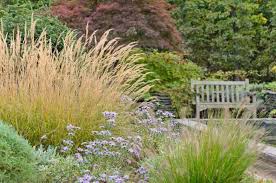
Grasses are a wonderful addition to any garden, adding texture and leaf colour, movement and sound. They add structure to the winter garden and are particularly useful in smaller spaces as they give height and privacy with the taller varieties without the space garbing that a shrub would do. At this time of year they particularly come into their own, with great flowers and seed heads that catch the autumn sun and some varieties have good autumn colour. Here are a few varieties;
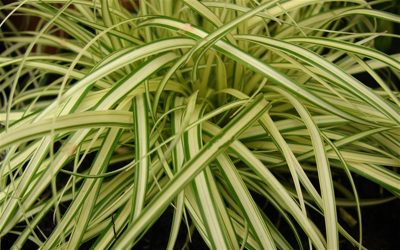
Carex oshimensis ‘Evergold’
Carex oshimensis ‘Evergold’: A wonderful low growing clump forming evergreen variety. With emerald green thin leaves with a golden yellow central stripe. Dose best in semi-shade, with humus rich soil but will cope with some drying out. 30 x 40cm, small flowers with brown tusks 40cm.

Festuca glauca ‘Elijah Blue’
Festuca glauca ‘Elijah Blue: A superb low clump forming grass for the dry garden with dense tufts of fine blue-grey evergreen foliage. With strong upright flowers with steely blue heads fading to a light tan are produced in June. Grows well in free draining soil in full sun. 20 x 30cm flowers 40cm.

Hakonechloa macra ‘Aboaurea’
Hakonechloa macro ‘Aboaure’: A medium sized lax clump forming grass that has a real wow factor for a sunny or semi-shade spot. Clumps of shaggy light green leaves with golden stripes with red tints in the autumn. This deciduous grass likes a good humus rich soil that will not dry out. Flowers are needle like spikelets are produced August to October. 30 x 45cm flowers 35cm.
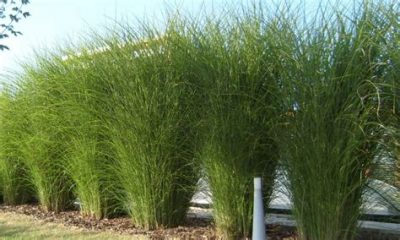
Miscanthus sinensis ‘Gracillimus’
Miscanthus sinensis ‘Gracillimus’: A distinctive grass which is a worth while addition to any garden. It is particularly useful in a small space for screening and adding privacy. Clumps of grey-green arching leaves reaching to 1.20m high that have an attractive orange tint in the autumn. Plumes of white twisted flowers are produced on slender stems July to October. This grass looks very good with winter light and frost and is a good over winter habitat for wildlife. Full sun to dappled shade. Grows in most soils but does not like to dry out. 1.20m x 1m x flowers 2m.

Chasmanthium uniola latiflia
Chasmanthium uniola latifolia: This unusual deciduous grass forms slow growing clumps. With broad mid-green leaves held on the stems to give a ‘bamboo’ like look to the plant. The leaves have good autumn colour. The flowers are produced on tall drooping stems and are like wild oats in shape and a soft green colouring and hang from the stem like drops of water. Needs good humus rich soil which will hold moisture and needs semi-shade. 90Cm x 75cmx flowers 1.10m
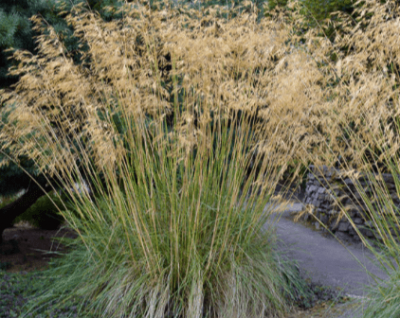
Stipa gigantea
Stipa Gigantea: A striking grass that makes a good focal point: It forms a large clump of evergreen foliage, with thin grey arching leaves. By mid June stems arch above the clump, with delicate flower heads of golden oat like flowers. This grass needs full sun and is draught resistant and needs free draining soil to thrive. 75Cm x 90cm x flower 2.m.

Sweeps of glasses make a dramatic planting.
There really is a grass for every garden situation from the damp shady corner to the dry shade of a woodland area to the thin soils of the coastal garden and the boggy wet area of heavy soils. To the full sun of a chalky bank, all will find a grass to inhabit it. They can be used as focal points or statement plants, as a privacy screen or a low growing sweep of foliage colour and texture though a woodland planting. They look wonderful planted on mass or as an important addition to a well planed planting scheme. They are widely versatile plants that are easy to grow, and Should have a place in nearly every garden.
So I hope I have inspired you to look at grasses in a new light.
If you want help with planning new planting scheme or updating and renewing existing ones, then please do contact me. Tel:01273 470753
Naturalising Narcissi and other bulbs
Now is the time of year to get the bulb catalogues out and start to think about the spring display. Bulbs look great in pots and flower beds, but they come into their own when planted on mass. Sweeps of bulbs along a winding drive, clumps in long grass under fruit trees, or lining the bottom of a hedge, naturalising bulbs make their impact. Here is a selection of good naturalising bulbs, that will bulk up and increase in number, from late January to April.
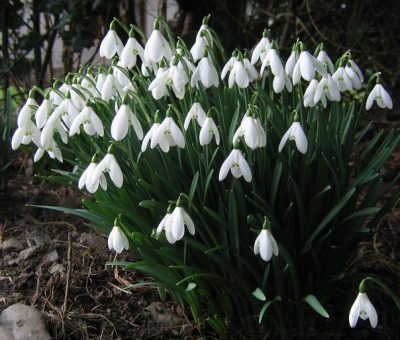
G. nivalis
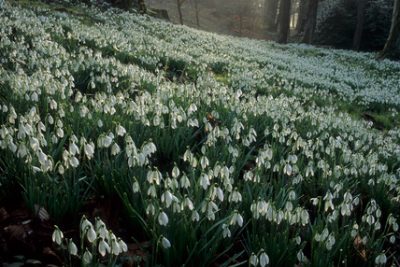
Galanthus nivalis: The native snowdrop. Plant in sparser grassy areas so they do not get over come, or in woodland margins Plant in groups, well spaced to allow for the bulbs to bulk up. Flowering mid- January to mid-February.
G. ‘Atkinsii’
G. ‘Atkinsii’: taller plants with larger white flowers and green tip markings, than the common snowdrop. Again a good nationalising bulb, plant as above . Flowers January to February.
Crocus ancyrensis ‘ Golden Bunch’: early Dutch crocus, plant in short grass in clumps, in sunny areas. Thin dirk green leaves with central sliver stripe. Egg yolk yellow bowl shaped flowers that when the sun is shinning, open flat to show orange stamens. Flowering February to March.
C.etrusus ‘Zwanenbury’
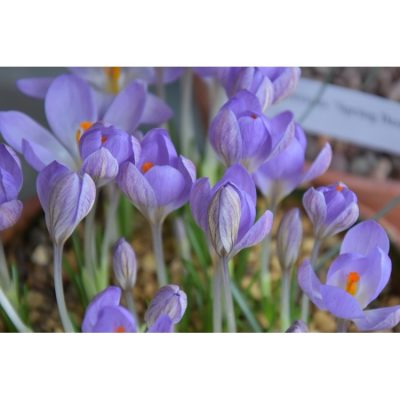
C. etrusus ‘Zwanenburg’: again an early Dutch crocus, plant as above. Wider leaves with a more pronounced sliver stripe. Soft mauve flowers with lower grey/white base, again stunning when the sun is shinning and they open up fully.
Both these crocus bulk up well, as long as the mice do not get feeding. My top tip, would be to plant them on a south facing bank, where they can really be seen at their best in the early spring.
N. ‘Mount Hood’
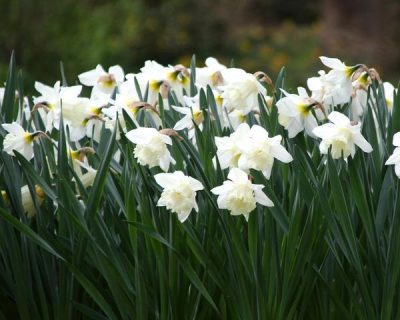
Narcissi ‘Mount Hood’: A good naturalising mid season Daffodil. With white/cream trumpet and white slightly refluxing petals, at 35-40cm tall. Plant in dense sweeps or irregular clumps to give a natural look. Allow room for the bulbs to increase. Flowering late March to mid- April.
N.poeticus recurvus
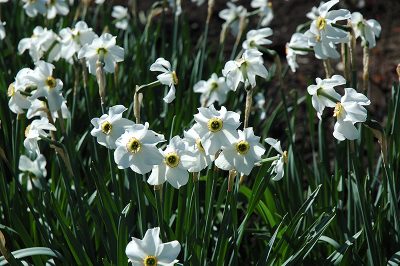
N.poeticus recurvus: The old fashioned and much loved ‘Pheasant eye’ Narcissus. This late flowering bulb looks wonderful planted in an orchard in great sweeps under fruit trees which will have blossom at the same time. Tall at 40-45cm. An open flower of flat white almost papery petals and a small shallow orange red tinged central cup and low soft yellow stamens, with a delicate scent. Flowering mid April into early May.
All these bulbs do best in a sunny spot,apart from the snowdrops that can cope with the woodland edge. So get ordering your bulbs now for October/ November planting. Follow carefully the bulb nurseries planting instructions, particularly about bulb planting depths. Most people tent to plant their bulbs to close to the surface, in shallow scoops particularity when planting in grassland. Always wait till there has been a good quantity of autumn rain to help soften the ground up first. Also if you are planting a lot, which you will have to do if you want sweeps of natural looking bulbs, it will be in the hundreds, a bulb trowel or bulb planter will be invaluable.
So get cracking now for a wondrous bulb displays next spring.
Plums and GreenGages – The taste of High Summer!
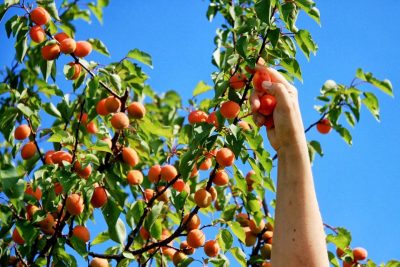
The joy of growing and picking your own fruit!
There has to be nothing quite like picking a ripe, juice laden plum from a tree in your own garden, to make the heart quicken a little in all gardeners. While vegetable gardening is hard work, fruit growing is retentively easy and the most work you will have, will be in the harvesting. Here are some firm favourites
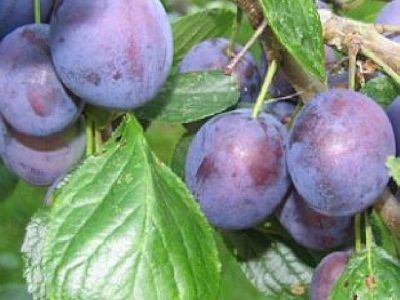
Plum opal
Plum Opal: Oval medium sized fruit, yellow with a purple flush and a strong sweet flavour. Middle of August, good reliable cropper. Partially self-fertile.
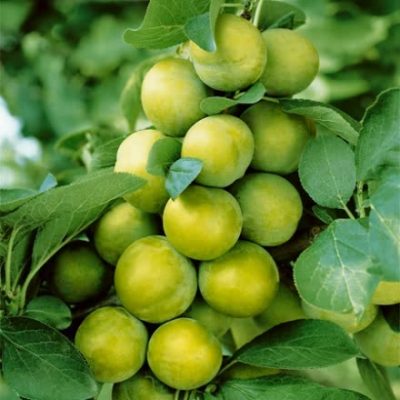
Green Gage
Green Gage: The original old gage. Small very juicy round green fruit, with a rich sweet aroma. Produced mid-season, end July early August. Partially self -fertile.
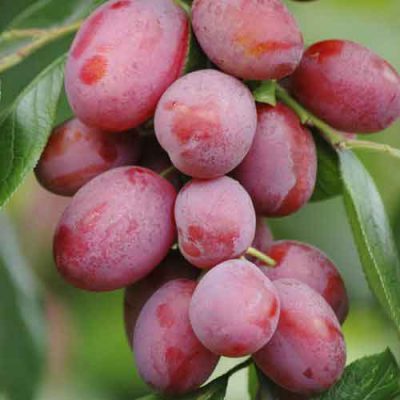
Plum Victoria
Victoria Plum: A firm old favourite. Medium sized fruits rosy pink, with blue bloom, sweet yellow juicy flesh. Harvey regular cropper. Dual use, cooking or dessert. Late August -early September. Self-fertile.
Cambridge Gage
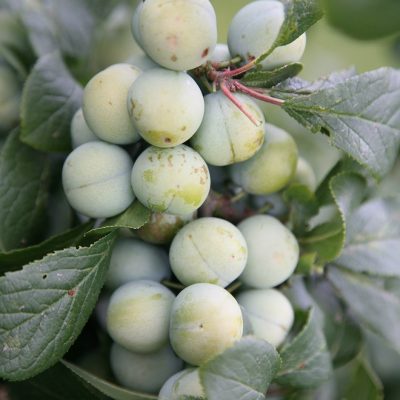
Cambridge Gage: Green/yellow round fruit, very juicy sweet yellow flesh,. An excellent early gage, a prolific cropper. Early August. Pollinators Laxton gage, Merryweather Damson.
Plum Marjorie’s Seedling
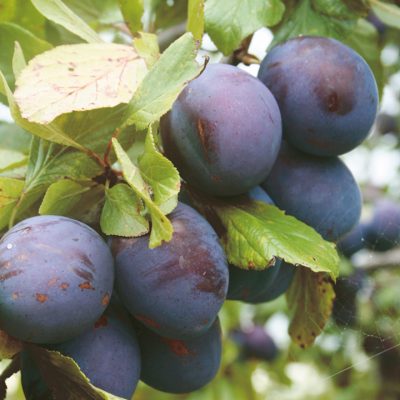
Plum Marjories Seedling: Enormous blue/black plums with blue/grey bloom. Yellow juicy flesh. Cooker, excellent bottling plum. When very ripe easily good enough to eat straight from the tree, as a dessert plum. Late, end September into October, and the fruit can last on the tree into November. Self -fertile.
Luxton Gage
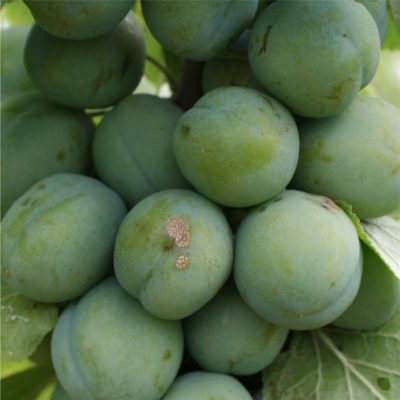
Laxton Gage: A large green fruit with yellow/green sweet flesh. Good cropper, Mid August. Self-fertile.
Now is the time, to make your selections, taste your way through different variates growing in friends gardens, taking notes of the ones you want to grow. Most come on dwarfing root stock, so are suitable for a small garden and a lot are self-fertile, so you don’t need the added room for a pollinator tree. Order your trees early autumn for winter delivery and planting. Top tip, Stone fruit like lime, so if your soil is heavier, then add some lime.
This is the time of year when the crop begins to ripen for early gages and plums are just around the corner. Enjoy!
